

Are you considering using water cooling? Need help putting your system together? Well you’re reading the right guide.
Some Loops:
For the first part of this guide I'm going to list a few loops. These loops are CPU only and will be rated on price and performance.
Eco loop
![Image]()
This loop is a basic eco loop for water coolers on a budget. It consists of all the basic things and comes in at a cheap £123.74 (Around $199.41). This may seem expensive but its actually only for a basic loop with low range parts. This will do the job and you may experience a 5c drop in temps but to be honest if you're only concern is cooling I would spend £50 and get a decent air cooler which could achieve the same results.
Don't get me wrong it will do the job but if you want to do it properly I'd spend a little more money otherwise you'll find yourself upgrading parts like I did all the time and it costs more in the long run.
![Image]()
Here is a list of links to the parts:
XSPC Delta V3 Universal CPU 775/AM3 Universal
Zinc Plated Jubilee Wormdrive Clip 3/4" OD (10 Pack)
XSPC Single 200 Bay Pump/Reservoir
XSPC RS120 Radiator - Black
Yate Loon 120mm D12SH-12 - 2200 RPM
1/2" ID - 3/4" OD XSPC Clear Hose 1m
PrimoChill PURE Performance Coolant (32 oz.) - Clear
Medium Range Loop
![Image]()
This loop is a medium range loop very similar to the loop used in this guide although its CPU only. It can cost roughly £170.14 (About $274.19) which again seems very expensive but you will notice a decent amount of cooling. I overclocked my E5200 from 2.5ghz to 3.5ghz and this system idles my CPU at about 24c and at load its 38c-41c which if you ask me is pretty impressive. For a starter loop I would recommend going with something like this even though its a little more expensive it gives decent performance for the price you pay.
Here are the links for these parts:
XSPC Delta V3 Universal CPU 775/AM3 Universal
Zinc Plated Jubilee Wormdrive Clip 3/4" OD (10 Pack)
XSPC Single Bay Reservoir
XSPC RS240 Radiator - Black
Xigmatek 120mm XLF-F1253 1500RPM - White LED
1/2" ID - 3/4" OD XSPC UV Orange Hose 1m
PrimoChill PURE Performance Coolant (32 oz.) - Clear
12V EK-DCP 2.2 Water Pump
High Range Loop
![Image]()
This is a high range loop and will give excellent performance and so it should for £262.88 ($423.65 roughly). This consists of the higher quality parts for a loop and will be great for an extreme overclocker, I should expect to see a 10c drop in temps which is a lot in my opinion. If you are just starting out though I wouldn't go for this loop unless you are planning on doing some extreme overclocking
![Image]()
Here is a list of the parts used:
HEATKILLER® CPU Rev3.0 775 Water Block
Zinc Plated Jubilee Wormdrive Clip 3/4" OD (10 Pack)
12V Laing D5 Vario Pump (Swiftech MCP655)
EK Multioption RES 250 Rev.2
XSPC RX240 Radiator - Black
Xigmatek 120mm XLF-F1253 1500RPM - White LED
1/2" ID - 3/4" OD XSPC UV Orange Hose 1m
PrimoChill ICE Non-Conductive Coolant (32 oz.) - Clear
The Guide:
The parts I’ve chosen to go in my loop are as follows:
![Image]()
This may seem a pricey set up but I'm afraid water cooling is an expensive option for cooling. I didn't buy all my stuff from this site though so I've saved a few pounds on some items. I have that XSPC res but the clear version not the UV blue but its the same thing really
![Image]()
Now firstly I must apologise for the quality of images throughout this guide, that’s something I need to improve on.
1. Firstly get everything out the boxes and lay it out. Tighten the barbs into all the parts with your fingers. Once you have done that get some pliers/grips and tighten half a turn to make them secure.
![Image]()
2. Once you have all the parts set out and ready with barbs installed get your motherboard out of your case and place it on an anti-static bag or your motherboard box. Follow the instructions that came with your CPU block to install it onto the motherboard and don’t forget to apply some thermal compound.
![Image]()
3. If you are installing a north bridge block which I am in this guide again follow the instructions to install it on the motherboard.
![Image]()
4. Now that you have all the blocks on the motherboard its time to securely screw it into the case
![Image]()
![Image]()
5. Now that the motherboard is in place, put the pump, res and radiator into place within the case how you want it.
![Image]()
![Image]()
6. You then need to check what part connects to what in the system, this is quite simple just make sure it goes.
Pump>Radiator>CPU Block>NB block>Reservoir>Pump
![Image]()
7. Having everything in place in the case will help you a lot when you are measuring the tubing for the various parts. Get your tubing and roughly measure how much tubing you want to go from the each part and cut it. Try and cut it so you get a perfect straight cut rather than a jaggy or sloped cut.
![Image]()
8. The first bit of tubing I'm going to install is the pump to radiator pipe. First you should get some near boiling water and put the end of the tube in for around 10 seconds to soften it up slightly, this helps a lot when trying to squeeze the tubing over the barb.
![Image]()
9. Once you have squeezed the tubing over the barbs put a worm clip on and tighten it up so its secures the tubing in place. Don't over tighten it how ever as this may damage the tubing.
![Image]()
10. Do this for the remaining connections and make sure its all nicely tightened and secure.
![Image]()
11. Fill the reservoir up with as much fluid as you can get in it, some of the fluid will start to go into the tubing which is great to see if there are any early leaks with at the reservoir.
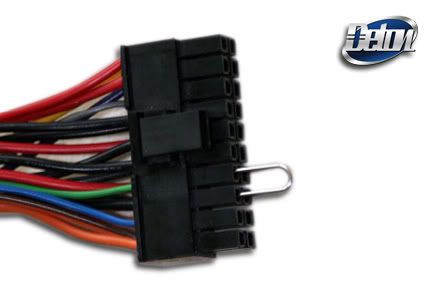
12. Unplug everything from the PSU but the pump's power connector. Then find a paper clip and jump start your PSU by putting one end in the green wire and the other end in any black wire. (Make sure its not switched on at this point)
![Image]()
13. Get some paper towels and wrap them round the barbs a little so if there are any leaks you can hopefully see it and turn off the computer. Don't worry if you get a leak though just turn off the PC and tighten the barb or reseat the tubing and try again.
14. Power on the PSU by switching it on at the rocker switch on the back, the pump should kick into life and pump your fluid round pretty quickly. At this point you need to be ready to keep topping up the reservoir as it sucks the fluid through.
15. Stop filling the res up when it reaches a similar limit to mine shown in the picture.
![Image]()
16. Screw the cap on the reservoir and give the case a good shake side to side to attempt at removing any air bubbles that will be caught up in the loop. Note: You may need to top your res up after this
![Image]()
17. Leak testing: It varies, some people say test it for 24 hours and others test for minutes. This was my main concern when I was new to watercooling although if you do it correctly I can't see there being any leaks but you never know about defective tubing/parts/barbs.
Personally and with this guide in fact when I put this loop together earlier I only tested it for around 15mins and then plugged all my pc parts back in and fired it up. You can test it for as long or as little as you like but i'd give it 30mins to assure yourself before you connect everything back up
![Image]()
18. Now that you've built your PC back up, switch some UV lights on and take some pictures! Showcase it to us on this forum
![Image]()
![Image]()
I hope you enjoyed reading this guide and found it useful and that you enjoyed putting together your new cooling system.
![Image]()
Some Loops:
For the first part of this guide I'm going to list a few loops. These loops are CPU only and will be rated on price and performance.
Eco loop

This loop is a basic eco loop for water coolers on a budget. It consists of all the basic things and comes in at a cheap £123.74 (Around $199.41). This may seem expensive but its actually only for a basic loop with low range parts. This will do the job and you may experience a 5c drop in temps but to be honest if you're only concern is cooling I would spend £50 and get a decent air cooler which could achieve the same results.
Don't get me wrong it will do the job but if you want to do it properly I'd spend a little more money otherwise you'll find yourself upgrading parts like I did all the time and it costs more in the long run.

Here is a list of links to the parts:
XSPC Delta V3 Universal CPU 775/AM3 Universal
Zinc Plated Jubilee Wormdrive Clip 3/4" OD (10 Pack)
XSPC Single 200 Bay Pump/Reservoir
XSPC RS120 Radiator - Black
Yate Loon 120mm D12SH-12 - 2200 RPM
1/2" ID - 3/4" OD XSPC Clear Hose 1m
PrimoChill PURE Performance Coolant (32 oz.) - Clear
Medium Range Loop

This loop is a medium range loop very similar to the loop used in this guide although its CPU only. It can cost roughly £170.14 (About $274.19) which again seems very expensive but you will notice a decent amount of cooling. I overclocked my E5200 from 2.5ghz to 3.5ghz and this system idles my CPU at about 24c and at load its 38c-41c which if you ask me is pretty impressive. For a starter loop I would recommend going with something like this even though its a little more expensive it gives decent performance for the price you pay.
Here are the links for these parts:
XSPC Delta V3 Universal CPU 775/AM3 Universal
Zinc Plated Jubilee Wormdrive Clip 3/4" OD (10 Pack)
XSPC Single Bay Reservoir
XSPC RS240 Radiator - Black
Xigmatek 120mm XLF-F1253 1500RPM - White LED
1/2" ID - 3/4" OD XSPC UV Orange Hose 1m
PrimoChill PURE Performance Coolant (32 oz.) - Clear
12V EK-DCP 2.2 Water Pump
High Range Loop

This is a high range loop and will give excellent performance and so it should for £262.88 ($423.65 roughly). This consists of the higher quality parts for a loop and will be great for an extreme overclocker, I should expect to see a 10c drop in temps which is a lot in my opinion. If you are just starting out though I wouldn't go for this loop unless you are planning on doing some extreme overclocking

Here is a list of the parts used:
HEATKILLER® CPU Rev3.0 775 Water Block
Zinc Plated Jubilee Wormdrive Clip 3/4" OD (10 Pack)
12V Laing D5 Vario Pump (Swiftech MCP655)
EK Multioption RES 250 Rev.2
XSPC RX240 Radiator - Black
Xigmatek 120mm XLF-F1253 1500RPM - White LED
1/2" ID - 3/4" OD XSPC UV Orange Hose 1m
PrimoChill ICE Non-Conductive Coolant (32 oz.) - Clear
The Guide:
The parts I’ve chosen to go in my loop are as follows:

This may seem a pricey set up but I'm afraid water cooling is an expensive option for cooling. I didn't buy all my stuff from this site though so I've saved a few pounds on some items. I have that XSPC res but the clear version not the UV blue but its the same thing really

Now firstly I must apologise for the quality of images throughout this guide, that’s something I need to improve on.
1. Firstly get everything out the boxes and lay it out. Tighten the barbs into all the parts with your fingers. Once you have done that get some pliers/grips and tighten half a turn to make them secure.

2. Once you have all the parts set out and ready with barbs installed get your motherboard out of your case and place it on an anti-static bag or your motherboard box. Follow the instructions that came with your CPU block to install it onto the motherboard and don’t forget to apply some thermal compound.

3. If you are installing a north bridge block which I am in this guide again follow the instructions to install it on the motherboard.

4. Now that you have all the blocks on the motherboard its time to securely screw it into the case

5. Now that the motherboard is in place, put the pump, res and radiator into place within the case how you want it.


6. You then need to check what part connects to what in the system, this is quite simple just make sure it goes.
Pump>Radiator>CPU Block>NB block>Reservoir>Pump

7. Having everything in place in the case will help you a lot when you are measuring the tubing for the various parts. Get your tubing and roughly measure how much tubing you want to go from the each part and cut it. Try and cut it so you get a perfect straight cut rather than a jaggy or sloped cut.

8. The first bit of tubing I'm going to install is the pump to radiator pipe. First you should get some near boiling water and put the end of the tube in for around 10 seconds to soften it up slightly, this helps a lot when trying to squeeze the tubing over the barb.

9. Once you have squeezed the tubing over the barbs put a worm clip on and tighten it up so its secures the tubing in place. Don't over tighten it how ever as this may damage the tubing.

10. Do this for the remaining connections and make sure its all nicely tightened and secure.

11. Fill the reservoir up with as much fluid as you can get in it, some of the fluid will start to go into the tubing which is great to see if there are any early leaks with at the reservoir.
12. Unplug everything from the PSU but the pump's power connector. Then find a paper clip and jump start your PSU by putting one end in the green wire and the other end in any black wire. (Make sure its not switched on at this point)
13. Get some paper towels and wrap them round the barbs a little so if there are any leaks you can hopefully see it and turn off the computer. Don't worry if you get a leak though just turn off the PC and tighten the barb or reseat the tubing and try again.
14. Power on the PSU by switching it on at the rocker switch on the back, the pump should kick into life and pump your fluid round pretty quickly. At this point you need to be ready to keep topping up the reservoir as it sucks the fluid through.
15. Stop filling the res up when it reaches a similar limit to mine shown in the picture.

16. Screw the cap on the reservoir and give the case a good shake side to side to attempt at removing any air bubbles that will be caught up in the loop. Note: You may need to top your res up after this
17. Leak testing: It varies, some people say test it for 24 hours and others test for minutes. This was my main concern when I was new to watercooling although if you do it correctly I can't see there being any leaks but you never know about defective tubing/parts/barbs.
Personally and with this guide in fact when I put this loop together earlier I only tested it for around 15mins and then plugged all my pc parts back in and fired it up. You can test it for as long or as little as you like but i'd give it 30mins to assure yourself before you connect everything back up
18. Now that you've built your PC back up, switch some UV lights on and take some pictures! Showcase it to us on this forum

I hope you enjoyed reading this guide and found it useful and that you enjoyed putting together your new cooling system.


 I've been watercooling for around 7 months now and mines been fine *Touch wood*


