

I recently sleeved my first set of cables and thought it would be cool to sew them neatly together like I saw in the "CaseLabs TH10 Red and Black Build" build log from P3nnywise. I did a little research and found a 4 part video on cable sewing from
. This video does show you how to sew the wires together, but parts of it are hard to see what is going on. I watched it many times until I figured out the process and then proceeded to sew several power cables together. I posted some pics of the results in my build log and a few people requested a tutorial.
So, here it is: (Click on any photo to get the larger version)
The thread is important. I found this heavy duty "Button & Carpet" thread in the "Speciality" thread section of the fabric store. This is 74% poly and 26% cotton. It doesn't stretch and it is not smooth so it has some friction.

Next is curved needles. I started with straight needles and quickly found them hard to use. You need two of the same size so I had to buy two packages.

So, you start by just tying the thread to two curved needles:

The example I will use is two sets of 6-pin GPU power cables. Each GPU power cable is 2 rows of 3 wires. So, when I put them together, I have a total of 2 rows of 6 wires.
You start by putting both needles through the first "stack" of 2 wires:

This first knot starts with a loop like this:

Then you bend it over so it looks like this:

This first knot is hard to explain. The trick that Frank N. Stein shows in his video is easy to see the motion.
Then you put both needles through it like this:

And you end up with a knot like this:

Then you pull it tight:
This leather thimble will save your finger! Trust me, go get one from the fabric store.

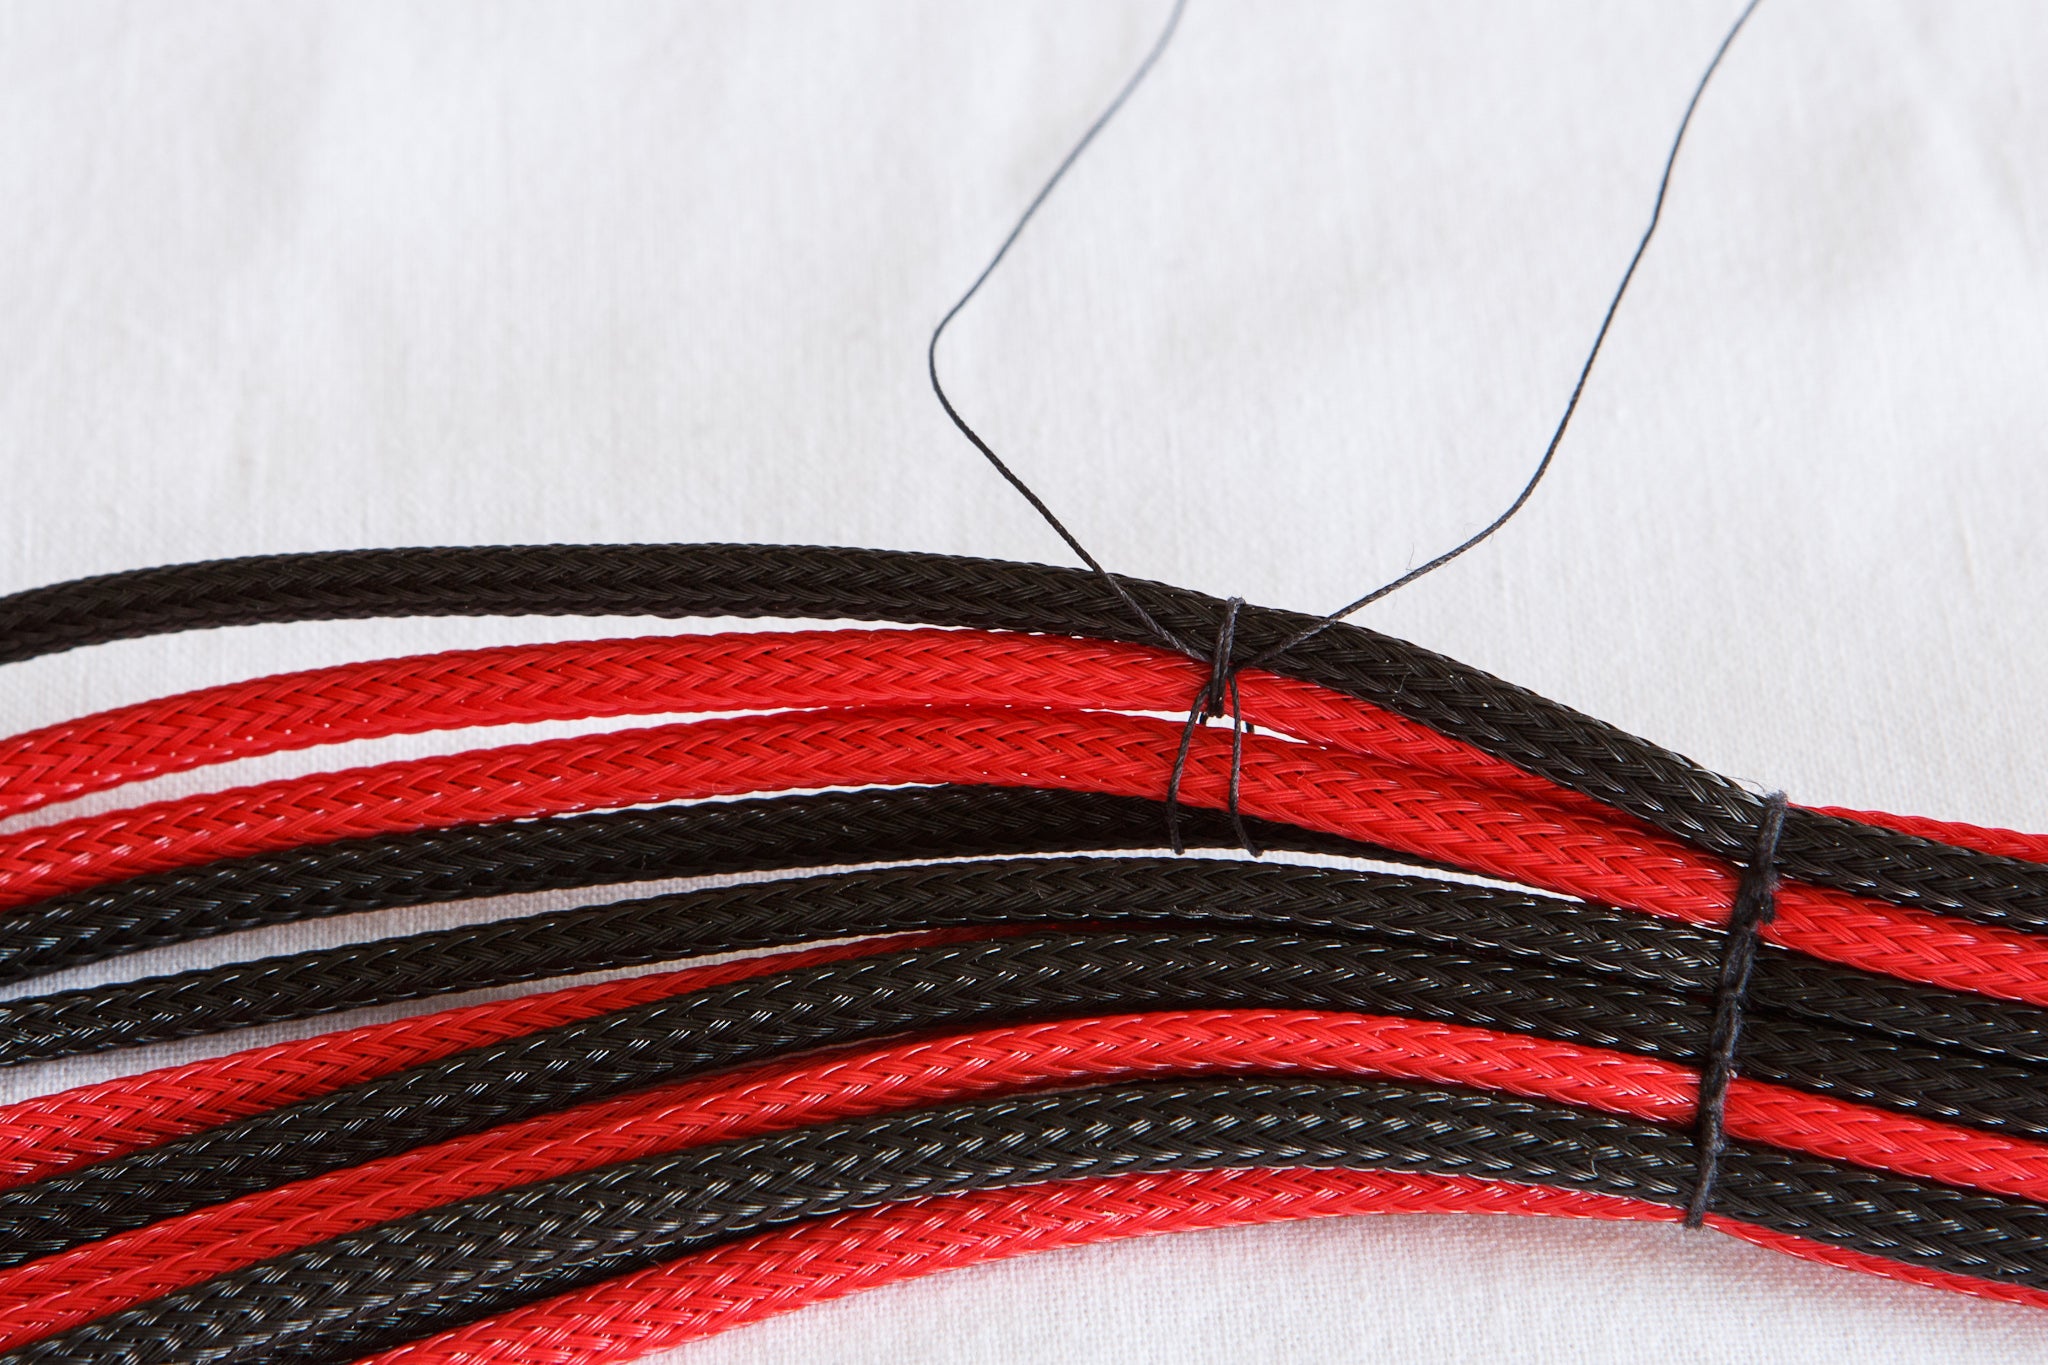
Next, choose a spacing you want and adjust this first knot to where you want it. I used 30mm because I liked the way it kept the cable straight or curved as I completed each sewn line.

Now, "tie off" this first knot and move it to either the top or bottom of the cable. Remember that the final knot will be on the side where this first knot is.

Now flip the cable over so that the knot is up and put the first needle through the next "stack" of wires like this:

And pull the thread through:

Now put the other needle through that same stack of wires.

And pull the thread through: Be sure you have put the threads through the correct set of two wires. It is easy to get the wrong ones. Also be sure not to cross the threads. It will look better in the end if the threads do not cross each other.

Now flip the cable over and take the needle from the thread on the right and put the needle through the threads around the first "stack" of wires. Use the space between the stacked wires. This is where the videos said to just use the bare thread and push it through this gap. Well, I had trouble doing that so that's how I started to just use needles.

And pull the thread through:

Now take the needle from the thread on the left and put the needle through the same threads around the first "stack" of wires, but in the opposite direction like this:

And pull the thread through:
Now, pull the threads tight. Here is wher you make sure the wires are stacked the way you want them. You would also add any curve or bend in the overall cable here so that the threads keep the cable to the shape you want.

Now, take the thread from the left and push its needle between the two stacks of wires to the right side like this: the trick here is to use the length of the curved needle to slide in-between the two stacks of wires. If you try to simple push the needle straight through, you will likely skewer the sleeving and then the sew line will not be able to be moved and adjusted.

Push the needle all the way through:

Then pull the thread through:

Now, take the thread from the right and push its needle between the two stacks of wires to the left side like this:

Pull the thread through and then flip the cable over and pull both threads tight:

Then, tie off the threads like this:

Now, you are in a similar position as when you tied off the first knot.
So, you push the needles through the next stack of wires like this:

You flip the cable over and push the needle through the gap between this new stack like this:

Pull the threads through, push the needles through the right and left sides as before, flip the cable and pull both threads tight, as before:

Tie off this knot and repeat the process until this line is done. You tie off the last stack with a triple knot and then a tough of glue to make sure it doesn't come undone.

Flip the cable over and see the "good" side (without the knot)

This is the basic process. It took me about 15 minutes for each sew line for these two 6-pin GPU power cables
This process can work on any set of cables with 2 rows of wires like the CPU power cable, the GPU power cables, and the 24-pin ATX cable. Each sew line of the 24-pin cable took me about 40 minutes.
At 30mm spacing between sew lines, the time to sew the full length of a cable adds up!
Cheers,
So, here it is: (Click on any photo to get the larger version)
The thread is important. I found this heavy duty "Button & Carpet" thread in the "Speciality" thread section of the fabric store. This is 74% poly and 26% cotton. It doesn't stretch and it is not smooth so it has some friction.
Next is curved needles. I started with straight needles and quickly found them hard to use. You need two of the same size so I had to buy two packages.
So, you start by just tying the thread to two curved needles:
The example I will use is two sets of 6-pin GPU power cables. Each GPU power cable is 2 rows of 3 wires. So, when I put them together, I have a total of 2 rows of 6 wires.
You start by putting both needles through the first "stack" of 2 wires:
This first knot starts with a loop like this:
Then you bend it over so it looks like this:
This first knot is hard to explain. The trick that Frank N. Stein shows in his video is easy to see the motion.
Then you put both needles through it like this:
And you end up with a knot like this:
Then you pull it tight:
This leather thimble will save your finger! Trust me, go get one from the fabric store.
Next, choose a spacing you want and adjust this first knot to where you want it. I used 30mm because I liked the way it kept the cable straight or curved as I completed each sewn line.
Now, "tie off" this first knot and move it to either the top or bottom of the cable. Remember that the final knot will be on the side where this first knot is.
Now flip the cable over so that the knot is up and put the first needle through the next "stack" of wires like this:
And pull the thread through:
Now put the other needle through that same stack of wires.
And pull the thread through: Be sure you have put the threads through the correct set of two wires. It is easy to get the wrong ones. Also be sure not to cross the threads. It will look better in the end if the threads do not cross each other.
Now flip the cable over and take the needle from the thread on the right and put the needle through the threads around the first "stack" of wires. Use the space between the stacked wires. This is where the videos said to just use the bare thread and push it through this gap. Well, I had trouble doing that so that's how I started to just use needles.
And pull the thread through:
Now take the needle from the thread on the left and put the needle through the same threads around the first "stack" of wires, but in the opposite direction like this:
And pull the thread through:
Now, pull the threads tight. Here is wher you make sure the wires are stacked the way you want them. You would also add any curve or bend in the overall cable here so that the threads keep the cable to the shape you want.
Now, take the thread from the left and push its needle between the two stacks of wires to the right side like this: the trick here is to use the length of the curved needle to slide in-between the two stacks of wires. If you try to simple push the needle straight through, you will likely skewer the sleeving and then the sew line will not be able to be moved and adjusted.
Push the needle all the way through:
Then pull the thread through:
Now, take the thread from the right and push its needle between the two stacks of wires to the left side like this:
Pull the thread through and then flip the cable over and pull both threads tight:
Then, tie off the threads like this:
Now, you are in a similar position as when you tied off the first knot.
So, you push the needles through the next stack of wires like this:
You flip the cable over and push the needle through the gap between this new stack like this:
Pull the threads through, push the needles through the right and left sides as before, flip the cable and pull both threads tight, as before:
Tie off this knot and repeat the process until this line is done. You tie off the last stack with a triple knot and then a tough of glue to make sure it doesn't come undone.
Flip the cable over and see the "good" side (without the knot)
This is the basic process. It took me about 15 minutes for each sew line for these two 6-pin GPU power cables
This process can work on any set of cables with 2 rows of wires like the CPU power cable, the GPU power cables, and the 24-pin ATX cable. Each sew line of the 24-pin cable took me about 40 minutes.
At 30mm spacing between sew lines, the time to sew the full length of a cable adds up!
Cheers,


